SurveillanceSaver Revived!

SurveillanceSaver randomly goes out to open web cameras all over the world and uses their video streams as your screensaver.

This has a strangely hypnotic effect, and it was really fun to watch.  This was all the rage back in 2007.

I suddenly remembered how much fun this was the other day, and went to install the original SurveillanceSaver on a Windows machine with three monitors.  I thought it would be cool to have all three monitors going with different camera feeds.  It kind of goes with the super-villain vibe I’m cultivating in the office.

Turns out, the links included in the binary are all dead and there are bugs in the installer related to changes made in Windows years ago.  No problem, the source code is on Google Code and that still exists, right?  I briefly flipped open the code, saw that the comments were in German and that there was more than one file of actual code and just closed it.

Let’s be honest, there are many times when it’s just easier to rewrite the whole thing.  German comments and a whole ton of code for no discernible reason is one of those times.  I just grabbed some classes from the post-2007 internet that handled MJPEG streams and implemented all the ScreenSaver-specific stuff for modern Windows, slapped on about 200 lines that just randomly change which stream is going to what monitor, and we’re back in action!

Most importantly, it works on any number of monitors.

The code is on GitHub:  https://github.com/awgh/SurveillanceSaver

There is a Windows installer available here.

Here’s a couple pictures of three screens running SurveillanceSaver on my glowing desk:

surveillancesaver-3monitors1-lowres surveillancesaver-3monitors2-lowres

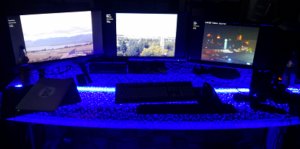
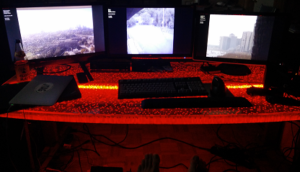
Three screens each have three separate video feeds, and there’s a bit of text added to the left side that attempts to guess where in the world the feed is coming from.  Every couple of minutes, the feeds will change.

Try it yourself, it’s fun!

To install, just run the installer and follow the prompts.  Then, right-click on the Desktop, go to Personalize, go down to Screen Savers, and then select “SurveillanceSaver” from the drop-down and hit OK.

One other note – the m05.de folks never published their Google search code that generated the list of webcam links the screensaver used.  It wouldn’t do any good now, anyway, since the Google Image Search API that it used got end-of-lifed a few years back.  I had to write an updater from scratch that is just doing some simple scraping.

For future work, I would love to expose the rotation timer to the Settings dialog and to fix the updater to use a proper Search API so that it can get more than 100 results per query.  I’d also like to update the original version of the Quartz Composer/OSX version of the same screensaver.  If any of you feel inspired, send me your pull requests!

XSS Cheat Sheet Calculators Revived

I’m dusting this blog off to write up some of my side projects from the past few years, and I notice I still have a link to to RSnake’s now-dead “XSS Cheat Sheet” page.  To this day, I still try to bring that site up just to use the little Javascript calculators at the bottom of the page.

There is still mirror of the original site on archive.org, but I’ve ripped out just the Javascript calculators and put them here as a single file:

https://www.awgh.org/pxsscs.html

Use it from the site, or download it and use it locally.  You can even add the list of XSS string suggestions back in if you want to, although the maintained version now lives at OWASP (although the OWASP version is missing the calculators).

Geolocation of IP addresses using GeoIP and Google Maps

People mean totally different things when they use the word “hack”.

To me, hacking is what Dr. Frankenstein did just before he created his monster.

Today’s creation will glue a few parts together to make a web site that will show the geographical location of an IP address on Google Maps.  This script also lets the user look up the geolocation by DNS hostname.

The advantage of my approach over some others on the net is that this method is totally free and requires no API key.  I’ve also made it portable to shared hosting sites, and it will run just as easily on Linux, OSX or Windows web servers.

Screenshot of iplocate.php in action

First, an ingredients list:

  1. A web server or web hosting site that supports PHP.
  2. A copy of the latest version of MaxMind’s GeoIP City database, which provides the mappings from IP to map coordinates in latitude and longitude.  You can download the latest free version here.
  3. The scripts require two PEAR modules:  Net_DNS and Net_GeoIP.  If you are running this on your own server, just use ‘pear install Net_DNS Net_GeoIP’.  If you are on Dreamhost, you can follow the awesome instructions on David Yin’s blog to get Pear installed first.

Once you have everything ready, all you need to do is download this PHP script, and customize it in a few places:

  1. If you are on Dreamhost, and you had to install Pear in your home directory, uncomment the Dreamhost section at the top of the file (and replace the path with the real path to the “php” subdirectory of your Pear installation.  If you followed David Yin’s instructions above, the path will be:
    /home/USERNAME/pear/php
  2. Replace the fake path on this line:
    $geoip = Net_GeoIP::getInstance("/FIX-THIS-PATH/GeoLiteCity.dat");
    with the real path to your GeoIP City database file.
  3. Replace the fake IP addresses on this line:
    $resolver->nameservers = array('YOUR.FIRST.DNS.HERE','YOUR.SECOND.DNS.HERE','YOUR.THIRD.DNS.HERE');
    with the real DNS servers that you want to use for looking up hostnames.
  4. Finally, copy the edited file into the documents folder of your web server (make sure that it has a .php extension) and point your browser at it!

You should now be able to enter an IP address or a hostname and have it pull up a Google Map of the correct coordinates!  If the hostname lookups don’t work off the bat, double-check step 2 above and try uncommenting the two DNS debugging lines in the PHP file.  Remember to give it DNS servers relative to your web server.

At this point, you might be wondering why I’m posting the PHP code instead of simply hosting this page myself. Turns out that Maxmind’s license for the free GeoIP database forbids you from providing a publicly-available interface that allows translating IP addresses into coordinates. The only way to do this (legally) using the free database is to either run this on an internal web server (not accessible to the public) or to password-protect the page using .htaccess files.

Obviously, this could be easily extended to add some stuff like plotting multiple different records from the DNS queries instead of just the first hit. Another idea is to make it spit out KML so that it would just magically work with Google Earth as well. I will leave that to you (or perhaps to some kindly strangers down in the comments).

Also, the hostname lookup feature reveals something interesting when you use it on edge-cached domains or clouds, but I’ll leave that for the home experimenter to explore.

… It lives, my creation LIVES

Jabbercracky: A Hash Cracking Web Service

It is with great pleasure that today I announce the first release of Jabbercracky, the hash-cracking web service.  MD5, NTLM, LM, and HalfLM are currently fully supported.  Jabbercracky will only work on Linux/Posix systems.

Jabbercracky makes use of a two-pass hash cracking method.  In the first pass, the submitted hash is tried against a local collection of rainbow tables.  In the second pass, the hash is passed along to a Cuda-compatable GPU for brute-forcing.

I’ve been hosting a Jabbercracky server with a large collection of rainbow tables on ChaosVPN since January, and I’ve recently done a bit of work packaging it as a Python module, so you can host your own cracking service with your own collection of rainbow tables!

jabbercracky-screenshot

On ChaosVPN, the service is available at: http://hash.colab.hack or http://10.100.23.1

The Jabbercracky module is currently being hosted on the Python Package Index, so all you need to do to install is:

1) easy_install jabbercracky

2) Go to the jabbercracky egg directory in site-packages and follow the installation instructions in INSTALL.txt

In future versions, Jabbercracky will live up to its name and also provide an XMPP-based interface, so you can crack hashes on your beefy hardware at home from the comfort of your mobile phone!

If you have any interest in participating in the development of Jabbercracky, please drop me a line!

Greetings to mc.fly and ryd and Defcon 18!

– awgh

How To Connect a PS/2 Keyboard to the iPhone

Although I’ve seen many pictures of PS/2 keyboards plugged into iPhones on the Internet, no one has yet published a detailed howto on how to get this working yourself.  Until now, that is.

In this article I will show you how you can make a PS/2 keyboard to iPhone converter, including all hardware and software instructions. As the bugs get worked out, or improvements are made, I’ll update this page. Continue reading “How To Connect a PS/2 Keyboard to the iPhone”

How To Win At Java Code Audit

Reviewing Java source code can pose a challenge for a security auditor, as methods used to exploit programs in C or C++, namely memory corruption bugs, are mitigated by Java itself, which hides the details of memory management from the programmer.  This same tendency to hide implementation details with a layer of abstraction leads to an entire class of common Java programming errors which can have a critical impact on the security of the application.

Java vulnerabilities are most commonly found in places where unsanitized user input is passed, directly or indirectly, on to an underlying library or service.  To put it another way, vulnerabilities aren’t found in the Java code itself, they are found by following user input through the Java source and out the other side.

The tendency of Java to hide implementation details from the developer actually creates these vulnerabilities in places where it might not otherwise exist.  Java developers use wrapper libraries for backend services, such as SQL or LDAP, and assume that they automatically sanitize their inputs, when usually they do not.  In most cases, Java wrapper libraries themselves are simply classes that store and manipulate strings which are just passed directly on to the wrapped service.  In many of these implementations, such as the ORM library Hibernate, there are architectural reasons why this behavior can not be changed.

In this post, I will describe a class of extremely common Java vulnerabilities, specifically these “pass-through” bugs, characterized by user input passing directly through Java unexamined.

Continue reading “How To Win At Java Code Audit”

Dehydra-GCC: Static Analysis for Poor People

Over the past few months, I’ve been playing with a new static analysis tool from Mozilla called Dehydra.

Dehydra is a GCC plugin that allows you to write Javascript that can perform queries on the Abstract Syntax Tree (AST) that GCC generates from source files.  This lets you write a script that can notify you when it sees any type of code construct that you can describe in script.

There are a number of code constructs that might be interesting to a code auditor, for example:

  • Calls to asnprintf, malloc, or calloc with unchecked return values.
  • Assignment operations where the datatype of the Left Hand Side is signed and the Right Hand Side is unsigned, or vice versa.
  • Assignment operations where the datatypes of both sides have different bit-lengths.

The possibilities are much greater than my short list of examples!

I will be the first to admit that static analysis has its faults.  For one thing, it has been proven that static analysis cannot discover all possible bugs in any given program.  Commercial static analysis tools, such as Coverity, are expensive and have not proven to be a particularly effective method of finding bugs by themselves.  I have heard many accounts of nasty bugs discovered by code auditors when looking through source code routinely scanned by Coverity.

That said, on Day One of a code audit, 4 out of 5 code auditors find themselves reaching for Grep.

Grep is great, it lets you search for regular expressions across many files very quickly, but Grep has no awareness of the syntax of the C++ programming language.  I’m really more interested in searching for specific code constructs and less interested in searching for substrings, which is Grep’s purpose.

When looking for vulnerabilities, I’m not interested in searching for the string “malloc”.  What I really want to know is more along the lines of “Where are all the calls to malloc where the return value is not checked”.  I don’t want to know all the locations of the string “int” as much as I want to know every location that a variable of type int is implicitly cast to an unsigned int when passed in as a function argument.

This is the great thing about Dehydra.  It lets you query the parsed syntax tree of C++ source code and ask the kinds of questions that can’t be easily answered by Grep.

Scripts for Dehydra are written in Javascript by way of the SpiderMonkey engine.  Javascript is a nice, small language that is good for operations on tree-like data structures.  In a browser, this would mean the DOM, but in GCC this means the AST!

Dehydra is still in development, but the developers have been extremely responsive to feature requests from security auditors ( well, mine anyway… *grin* ).

It would be great to see a bunch of people contribute scripts and build a big set of security scanning scripts to replace the venerable regular-expression-based FlawFinder as the king of no-budget security-oriented static analysis.

Try it out and get back to me.

Setup and Installation Instructions for Dehydra on Linux or OSX

I’ve included a sample Dehydra script below that logs a message anytime it sees certain assignment operations.

The full sample script, along with a test file, is available here.

function assignVisitor(node) {
   for(var i in node.statements) {
      var loc = node.loc
      var lhs = node.statements[i].type
      var rhs = node.statements[i].assign

      if( rhs && lhs ) {
         if( lhs.unsigned ) {
            if(parseInt(rhs[0].value) > 0) {
               print( "ASSIGN: negative to unsigned at:"+loc+"\n" )
            }
            else if(rhs[0].type && !rhs[0].type.unsigned) {
               print( "ASSIGN: signed to unsigned at:"+loc+"\n" )
            }
         }
         else if(rhs[0].type) {// lhs is signed
            if( rhs[0].type.unsigned ) {
               print( "ASSIGN: unsigned to signed at:"+loc+"\n" );
            }
         }
      }
   }
}

function process_function(decl,body) {
   iter(assignVisitor, body)
}

Groo: Fully Automated WEP Cracking

Updates Below!

I don’t know about the rest of you, but I have an entire room of my house which is simply a huge pile of electronics scrap.  A hacked Tivo, some chipped XBoxes, an old VCR, a pile of PCI video cards, a full shoebox of 64MB Compact Flash cards…  You get the idea.

One day, I decided to put some of this junk to good use and I wandered into the scrap heap looking for inspiration.

Inspiration came in the form of an Atheros wireless card and an old ITX barebones system that had been picked up from a junk table at DefCon for $60 the year before.  The ITX box has a single PCI slot, perfect for a decent Atheros wireless card with an external SMC antenna connector.  It also runs on 12V DC power, so I can run it off the car battery.

Over the next few weeks, I built a small embedded Linux system for the sole purpose of cracking WEP keys.

First, I added a USB wireless network card to use as a control interface that I could access from my iPhone.

I also built a small web service that completely automates the process using the Python web framework TurboGears, aircrack-ng, and screen.

The web interface is incredibly simple – it uses only a single combo box.  This makes it ideal for using from the iPhone.

Now, instead of being the sketchy guy sitting in my car with a laptop, I’m just another Seattle-ite staring into my iPhone while the computer doing the WEP cracking is running off my car battery halfway down the block.

Everything in the web interface is fire-and-forget.  You can view a list of available networks, select one for cracking, and it will automatically:

  1. Reconfigure the wireless interface to the correct channel
  2. Begin dumping packets with airodump-ng in a screen session
  3. Begin an ARP replay attack with aireplay-ng in a screen session
  4. Automatically kick off the actual WEP cracking by starting aircrack-ng in a screen session
  5. Once the crack has succeeded, save the ESSID, BSSID, and cracked WEP key in a SQLite database

Since each of the aircrack-ng tools are running in a separate screen session, you can disconnect from the control interface as soon as the crack starts.  You can also reconnect at any time during the crack and view each screen session separately.

When close enough to a target for the ARP replay attack to work, this script averages only 3 minutes to crack a WEP key.  This is on an ITX box with a wimpy Cyrix C3 processor with only 256MB of RAM!

My scripts and installation instructions available here.

Update:

I have ported these scripts to the EEE pc (I use Ubuntu Netbook Remix on a 900A), available here.

However, I can’t get airodump-ng to actually capture any packets!  I believe this is a problem with my madwifi driver, but I haven’t sorted it out yet.  Hopefully, if I post the scripts one of you can help me out 🙂

Another Update (October 2010):

Hello Hackaday!  Since writing this initial version, I’ve since learned a lot about Python job control.  Check out the Jabbercracky project, also on this site.  I’m planning on a much-improved version of Groo, using what I’ve learned from Jabbercracky, which will also add some new tricks, including some available WPA cracks.  I’d also like to improve the installer, and to also provide builds for Ubiquiti networks hardware.  If anyone is interested in helping out, please email me at awgh at awgh dot org.

Stay tuned…

XSS Vulnerability in Internet Explorer HTML Attachment Download

Update: MS fixed this issue in the IE8 6/9/09 security update.  Now IE8 behaves like Firefox (unclear on whether ‘X-Download-Options: noopen’ still exists at all).

I have noticed a Cross-Site Scripting vulnerability in the way Internet Explorer handles the downloading and opening of HTML files when they are downloaded as an attachment, rather than opened normally. This vulnerability exists in all versions of Internet Explorer, including the latest patch level of IE7 as of 12/23/08.

This vulnerability related to sites serving user-submitted HTML files with “Content-Disposition: attachment”.

When directly opening a downloaded HTML file, Internet Explorer violates the Same Origin Policy by allowing any script inside the downloaded file to access the cookies of the site the file was downloaded from. This script should be restricted to running in a local context, not a domain context.

Firefox exhibits better behavior by first downloading the HTML attachment and then opening it with a file:// URL. When scripts in the downloaded HTML file are executed, they are treated as if run from a local file, not as if run from the domain the file was downloaded from, and they cannot access the source domain’s cookies.

This vulnerability would allow an attacker to execute a Cross-Site Scripting attack on a site that allowed uploading file attachments. An HTML file could be uploaded containing malicious script that could steal user credentials or forge user actions on the site (if downloaded and opened by an IE user).

I have created a screencast reproducing the incorrect behavior in Internet Explorer as well as the correct behavior in Firefox. Additionally, I’ve set up a downloadable HTML file that you can use to reproduce the issue yourself!

The screencast and example are available at: https://www.awgh.org/iebug

Microsoft has addressed this issue in IE8, but their solution leaves me with some questions.  The write-up in their development blog is here, skip down to the section titled “MIME-Handling: Force Save”.  This section acknowledges that this is a potential vector for script injection in IE and describes the solution as implemented in IE8.

The solution in IE8:

The web server can set the response header “X-Download-Options” to the value “noopen”.  This will tell Internet Explorer to only offer the option to save the file or cancel.  It simply removes the “Open” option when this option is set.

I see two problems with this solution.  First, call me a pessimist, but I can see someone actually disabling “noopen” simply to bring back the “Open” dialog option.

Second, I doubt that most web server admins are going to be worried enough about this issue to remember to set this header, or even know they should do it.  It’s a bit of an esoteric bug – it only affects sites that serve untrusted HTML with “Content-Disposition: attachment”.  Even if Microsoft web servers set “noopen” by default, I doubt that most LAMP admins will bother adding this to their server options.

Why force the server to fix this problem?  Why not treat the “Open” option the same way Firefox does, by first downloading the file, then opening it with only a local script context?

This method of script injection will continue to work in Internet Explorer 8, as long as the site has not set the “X-Download-Options” header to “noopen”.

So the moral of the story:  If you are the admin of a site that serves untrusted HTML files with “Content-Disposition: attachment” set, please make sure the “X-Download-Options” header is set to “noopen”.

Weaponizing Mailinator

There has always been something deeply unsettling to me about the ‘Forgot Password’ functionality on many web sites.

The ‘Forgot Password’ page exists solely to help unauthenticated users bypass the usual means of authentication.

For whatever reason, many developers overlook the importance of locking this down, even after the issue of too-easily-guessable questions in Yahoo’s ‘Forgot Password’ procedure got a lot of media attention during the US presidential campaign after Gov. Palin’s webmail was hacked.

Even if the questions were based on specific preferences and more difficult to guess, very few sites will check for brute-force attempts on the ‘Forgot Password’ page, even though protections against brute-forcing have often been implemented in the more prestigious login page.

One other recommendation I usually make is the banning of email addresses from Mailinator, Slopsbox, and similar anonymous email services in registration.

If you’re not familiar with Mailinator, it’s an email server which displays ALL received emails to anyone who visits their web site.  Say you were registering for some web site and they asked for an address to send the validation email to.  You can just enter any email address at Mailinator, for example asdf@mailinator.com, and then go to www.mailinator.com and read the response.  This is great for not having to give out your real email.

What this means, however, is that I can simply go to the ‘Forgot Password’ page, which usually requires only an email address, enter asdf@mailinator.com, and a password reset email will be sent to Mailinator where I can collect it anonymously.  Any user account on any web service which was registered to a Mailinator email address can be compromised simply by guessing the email address.

Here’s where the brute-forcing comes in.  Since most sites let you make as many guesses on the ‘Forgot Password’ page as you’d like, there is nothing stopping an attacker from simply guessing email addresses at full tilt.

To demonstrate the effectiveness of this technique, I’ve written two example scripts, called the Mailinator-nator, which are available here.

The first script is called forgot-pwd-force.py, this script does the following:
1) Brute forces “Forgot Password” forms that only require email addresses on a hardcoded list of sites, using a wordlist of usernames.
2) For each username, tries each of the Mailinator domain aliases (Mailinator has a number of different domain names that point to the same place).

The second script is called mailinator-scan.py, this script does the following:
1) Reads a wordlist of usernames from a file.
2) For each username, connects to Mailinator and logs all emails to that user which contain the word “password”.

To use these two together, first add your target sites to forgot-pwd-force.py.  You can use one of my included wordlists or make your own, just be sure to use the same wordlist for both scripts.

Next, run the first script to force the target site to generate password reset emails to Mailinator addresses.

Wait a few minutes, and then run the second script to collect all of the return emails from the Mailinator server.

The second script can also be run as a cron job, which lets you troll Mailinator for password reset emails that you did not trigger yourself!  Mailinator deletes all received emails within an hour or two, so you may have to tinker with it to find a good interval.

I love Mailinator, so I checked and this doesn’t seem to violate their terms of service.  Looking at their site, they don’t seem to have terms of service!  This makes some kind of sense, since all users to the site are anonymous.  That said, actually logging in to a web site with a password recovered in this way is probably illegal in most jurisdictions so don’t do it.

As a site developer, what can you do to prevent these kinds of problems?

1) Ban registration emails to Mailinator and all of its domain aliases.

2) After 10 or so failed attempts to guess an answer on the ‘Forgot Password’ page, ban the IP for 5-15 minutes.

3) Require more than just the email address to send a password reset email.  Consider at least two factors: email address AND one security question.

These three measures will protect your ‘Forgot Password’ page from brute-forcing and dictionary attacks, as well as protecting your users from having their accounts stolen.

As a user of Mailinator, you can reduce your exposure to this risk by making use of the ‘Delete This Email’ feature of Mailinator and by using a long, difficult to guess user name.